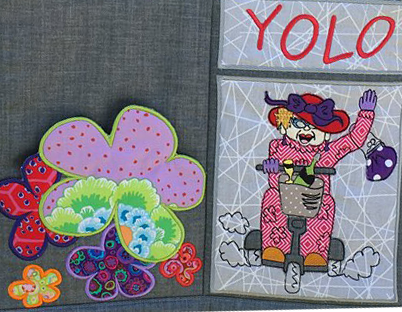
"In the Hoop" embroidery designs can sometimes be daunting when inserting a zipper. I know that I thought I would struggle with inserting a zipper in the beginning. At Sweet Pea we strive to encourage more and more people every day to conquer their fears, such as, inserting a zipper into a machine embroidery design such as a zipper purse. We’ve made a few free “learn to do in the hoop" designs that guide you through all the steps with clear instructions on how to insert the zipper and completely sew a fully lined zipper purse.
I thought to myself "Why not write a quick blog to let you in on our Sweet Pea secrets relating to all our machine embroidery projects that include inserting zippers into designs such as purses".
If you want to follow the steps for an actual design download one of our original free learn to do in the hoop designs on our website https://swpea.com/products/learn-how-to-do-in-the-hoop-free-puppy-purse-4x4-5x5-6x6
 Place the zipper right side up centred on the line, with the pull hanging past the side of the hoop. The zipper will be too long but this can be trimmed later when you trim the seam
 Tape in place with sticky tape or masking tape.

 Remove the tape.
 Fold fabric A in half and iron flat.
 Fold fabric B over one inch on one of the longer edges and iron flat.
 You should now have 2 pieces of fabric that look like this.
 Put the batting inside the folded pieces of fabric A and B.
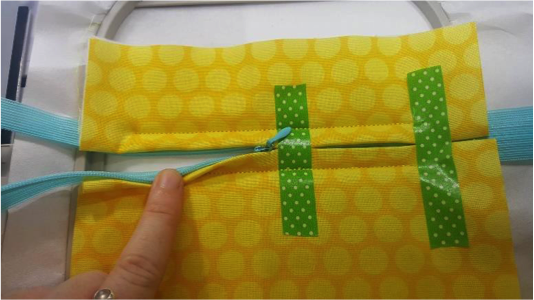
 Place the folded edges of fabric A and B (right sides up) meeting on the centre of the zipper and tape in place.


 (Make sure the zip pull is going to be within your stitching of the border before sewing the outline as shown. Otherwise you won’t be able to open the zip later.) Remove only the first piece of tape and bring the zipper pull into the middle of the panel. Once you have moved the zipper pull, you will need to put a piece of tape back down.
 Remove the tape.
 Before you embroider further make sure you move the zipper pull more towards the right hand side of the panel but away from the seam.

 Turn the hoop over so the wrong side is facing up.
 Fold fabric C lining over one inch on one of the longer edges and iron flat.
 Place on top of the hoop right side up with the fold in line with the centre of the zipper which you can see through the stabiliser. Tape in place so it doesn’t fall off when you turn the hoop back over.
Turn the hoop back over so the right side is facing up.


 Remove your work from the hoop the side with the zipper is now complete. Easy. Now you can continue to finish your Zipper Purse.
 Continue all steps and you will end up creating a cute little zipper purse.

 Hopefully this has shown you today that inserting an "in the hoop" zipper in a machine embroidery design is a technique that can be accomplished using our easily followed simple steps.
Sweet Pea Machine Embroidery Designs - how to insert a zipper in the hoop using these simple steps!
-
Have all of your cut pieces of fabric for the zipper panel ready.
-
Hoop tear away or soluble stabiliser in the hoop.
STEP 1 Stitch the zipper placement line onto the stabiliser.
 Place the zipper right side up centred on the line, with the pull hanging past the side of the hoop. The zipper will be too long but this can be trimmed later when you trim the seam
 Tape in place with sticky tape or masking tape.

STEP 2 Stitch the zipper to the stabiliser.
 Remove the tape.
 Fold fabric A in half and iron flat.
 Fold fabric B over one inch on one of the longer edges and iron flat.
 You should now have 2 pieces of fabric that look like this.
 Put the batting inside the folded pieces of fabric A and B.
 Place the folded edges of fabric A and B (right sides up) meeting on the centre of the zipper and tape in place.

STEP 3 Stitch the fabric down. This will run along the edges of the zipper and will avoid the middle of the zipper.

STEP 4 Stitch again with a triple stitch to strengthen the seam.
 (Make sure the zip pull is going to be within your stitching of the border before sewing the outline as shown. Otherwise you won’t be able to open the zip later.) Remove only the first piece of tape and bring the zipper pull into the middle of the panel. Once you have moved the zipper pull, you will need to put a piece of tape back down.
STEP 5 Stitch the border around the block.
 Remove the tape.
 Before you embroider further make sure you move the zipper pull more towards the right hand side of the panel but away from the seam.

STEP 6 Embroider the words “Owned by this Dog!”
 Turn the hoop over so the wrong side is facing up.
 Fold fabric C lining over one inch on one of the longer edges and iron flat.
 Place on top of the hoop right side up with the fold in line with the centre of the zipper which you can see through the stabiliser. Tape in place so it doesn’t fall off when you turn the hoop back over.

STEP 7 Stitch the lining to the back of the hoop. When the machine foot gets close to the zipper pull you might have to pause the machine and move the zipper out of the way.

 Remove your work from the hoop the side with the zipper is now complete. Easy. Now you can continue to finish your Zipper Purse.
 Continue all steps and you will end up creating a cute little zipper purse.

 Hopefully this has shown you today that inserting an "in the hoop" zipper in a machine embroidery design is a technique that can be accomplished using our easily followed simple steps.


Leave a comment
All comments are moderated before being published.
This site is protected by hCaptcha and the hCaptcha Privacy Policy and Terms of Service apply.