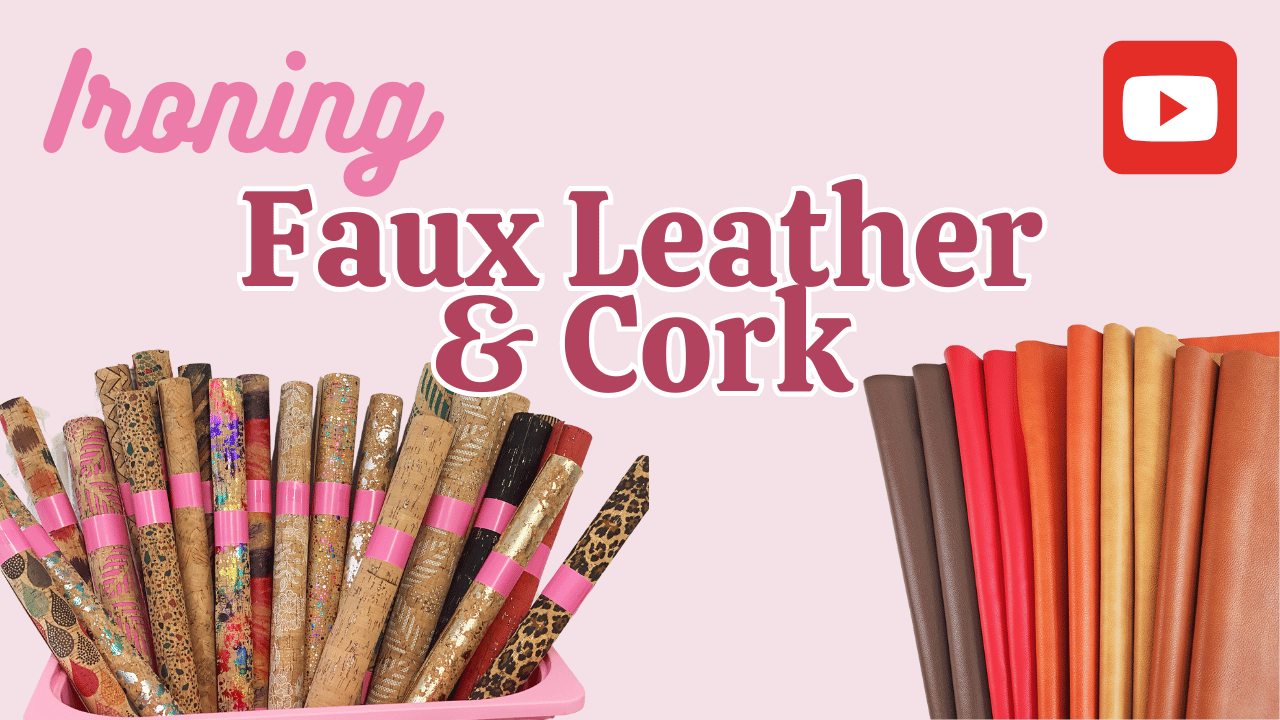
In this Sweet Pea Studio video and blog, we explore effective methods for handling pressing, seam opening, and finishing on PU (polyurethane), cork, and vinyl. We will cover tools, materials, and step-by-step procedures to help you master these skills.
Pressing Seams Open with a Pressing Mat
Tips and Tricks
- Avoid direct heat on PU, cork, or vinyl as they can melt or deform.
- Use a pressing mat—a heat-resistant, non-stick surface—to transfer heat gently.
- No steam needed; simply firmly press the seam onto the mat.
- Heat transfer through the mat softens the seam for easier opening.
- Using a clapper or a heavy book on the seam helps flatten and set the seam.
- Consistency in seam orientation (label always up) prevents sticky residue transfer.
How To
1. Place seam on pressing mat | Keep the **Sweet Pea label** facing up to prevent sticky residue contact with iron |
2. Apply firm pressure | No steam required; just press firmly |
3. Turn seam over | Repeat from the other side if necessary |
4. Transfer to cold surface | Use a **marble slab** or **cold clapper** to **rapidly cool** the seam, setting it flat |
Opening Seams in Difficult Areas
Some seams are hard to access - in such cases, pressing from both sides with a pressing mat helps. When full seam opening isn't feasible, focus on flattening and aligning the seam for a clean finish.
Using Heat to Achieve a Crisp Seal
Heat should be used on PU or cork that has been stitched and defoliated (pressed back) or to improve seam crispness when stitching alone doesn't produce a sharp edge.
Tools
- Dolly: a rolled-up piece of calico with stitches, used as a heat transfer tool.
- Iron: used indirectly—the dolly is heated and pressed onto the seam.
How To
1. Heat the dolly - use an iron to warm the calico dolly.
2. Position on seam - place the heated dolly on the seam, pressing gently.
3. Allow to cool - rapid cooling helps set the seam flat
Historical Note: The term "Dolly" originates from tailoring, where a raggy wool piece was used to open seams, a practice dating back to traditional tailoring.
Seam Flattening and Finishing
Some seams are naturally crisp and don't require additional pressing. For thicker or spongier seams, a little heat and pressure can help flatten and set the edges. Finger pressure can sometimes suffice for thin seams.
Sealing Seams with Adhesive Tape
When stitching isn't possible or desired, hoop tape (a double-sided adhesive tape) can hold seams open.
How To
1. Lift the seam - use a tunneling technique to lift the seam slightly.
2. Apply hoop tape - carefully tunnel the tape into the seam.
3. Press firmly - ensure the tape adheres well without stitching through it.
Important: Do not stitch through the tape; it’s meant for seam stabilisation. This method is more common in garment construction but can be adapted for bag making.
Handling PU and Cork for Specific Applications
When attaching PU or cork to zippers or edges, pressing and sealing techniques ensure clean attachment. For bags or clutches, defoliating (pressing back) the seam creates a neat finish. Sometimes, additional heat is used to crisp the edge, especially when stitching alone leaves the seam soft or wavy.
Additional Tips and Best Practices
- Always test on scrap material before working on your project.
- Use consistent pressure and timing to avoid overheating or melting.
- Keep tools clean and free of residue to prevent sticking.
- When working with heat-sensitive materials, minimal heat and quick cooling are essential.
Mastering seam opening, pressing, and sealing techniques for PU, cork, and vinyl can enhance the professional quality of your projects - the key is to use the right tools. Remember, practice makes perfect, and always test on scraps to refine your technique.
Thank you for joining us at Sweet Pea Studio. We hope these tips help you create beautiful, professional-looking projects with ease. Happy sewing!
Leave a comment
This site is protected by hCaptcha and the hCaptcha Privacy Policy and Terms of Service apply.