In this Sweet Pea Studio video, we looked at cost-effective and efficient methods for managing stabiliser and fabric scraps in embroidery projects. The transcript offers practical tips, step-by-step procedures, and creative solutions for stabilizer handling, patching, and fabric joining, aimed at both novice and experienced embroiderers alike.
1. Selecting and Preparing Stabiliser
Cutaway stabiliser is favoured for most projects due to its durability and stability. Tear-away and see-through stabilisers are less preferred in this context, but still used in certain applications.
To ensure enough stabilizer in the hoop, add approximately 3/4 inch (2 cm) around the design. This margin allows for manipulation, pinning, and secure hooping.
Use a ruler and rotary cutter* to cut a piece slightly larger than the design, leaving a seam allowance of about half an inch (1.27 cm). The excess stabiliser can be joined or patched later, reducing waste.
2. Hoop Assembly and Stabiliser Placement
Whenever you start a project, you need to begin with assembling stabiliser in the right hoop. Choose the right size, loosen the inner hoop, and place the stabiliser inside, ensuring it is not wrinkled. Centre the stabiliser, then tighten gently. Use upholstery pins along the long edges to secure the stabiliser, especially if the edges are curved.
Alternatively, some machines have clamp clips around the hoop, which are convenient but may be difficult to remove.
3. Marking and Testing
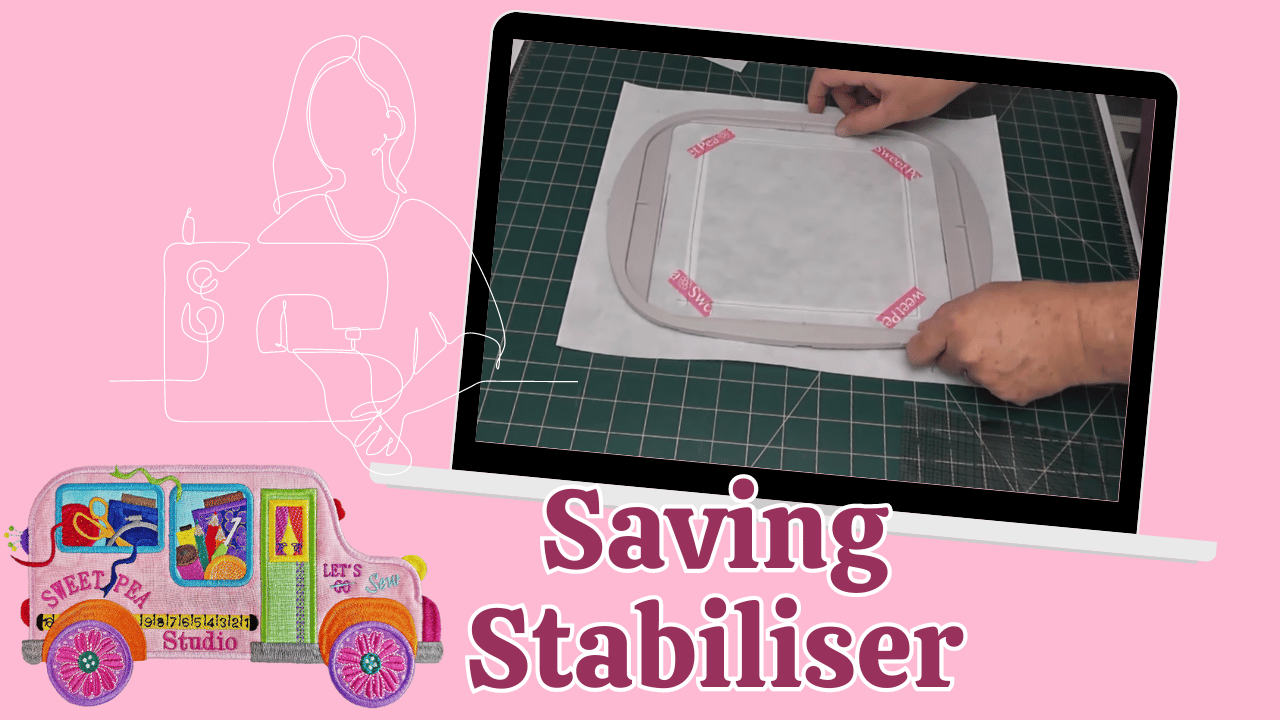
Use a marker or washi tape to mark around the design's perimeter. This helps detect creep during embroidery and guides precise trimming.
Embroider a test block to check for stabiliser tension and design accuracy, using a large stitch length for easy removal of the test stitches afterward.
4. Managing Excess Stabilizer
Once you have completed a project, carefully remove the hoop and cut out the embroidered block, leaving a seam allowance of about half an inch.
You can also use offcuts to patch the main stabiliser piece, especially if the shape fits the hoop. This approach reduces waste and saves money.
5. Creating and Using Patches
To create a patch, cut a square with a seam allowance of half an inch around the design. Use washable glue (e.g., Elmer’s) to adhere the patch to the stabilizer, allowing it to dry clear. Sew around the patch with long stitches to secure it, ensuring flatness and prevent puckering.
6. Re-hooping and Alignment
Use registration marks to align patches during re-hooping. Turn the inner hoop upside down and apply double-sided tape along the edges for precise placement.
When securing to your hoop, carefully press the hoop onto the stabiliser, ensuring no shifting occurs. Use pins or clips to hold everything in place during embroidery.
7. Removing and Reusing Stabilizer
After embroidery, remove the hoop and gently unpick the large stitches. Reuse the stabilizer for subsequent blocks by aligning and securing it with tape or pins.
8. Efficient Fabric and Batting Management
From a single strip of fabric, cut multiple blocks, saving material. You can also use offcuts to patch or join fabric pieces, reducing waste.
To join batting, use a triple stitch (a straight stitch over the seam) to join batting pieces. This method avoids ridge formation, common with zigzag stitches.
9. Cost-Saving Tips and Material Alternatives
Common Fabrics, such as quilter’s muslin, calico, or woven cotton can substitute for stabiliser in some cases. These materials provide good stability and handle for blocks.
However, investing in good quality stabilizer reduces waste and rework. Proper handling minimises material loss and costs.
By precisely cutting, patching, and joining materials, you can make the most of your resources while maintaining professional quality. The techniques outlined are practical, versatile, and adaptable to various projects. Embracing these methods not only saves money but also reduces waste, aligning with sustainable crafting practices.
Thank you for joining us at Sweet Pea Studio, and happy stitching!

Leave a comment
This site is protected by hCaptcha and the hCaptcha Privacy Policy and Terms of Service apply.