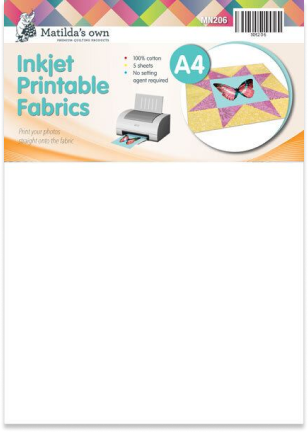
Machine embroidery offers a wide world of ideas, and one we love to implement in our designs is the use of photos! We do this by using inkjet printable fabrics, Matilda’s Own Inkjet Printable Fabric being our local choice. It functions just like any other fabric used within your embroidery projects, be it a part of the applique or a stand-alone fabric.
But how does it all work? Let’s get into it.
How to print photos on fabric
These steps show you how to use the inkjet printable fabric:
- Ensure your print image is the correct size on your computer (if using with one of our designs, we give you sizing in centimetres and inches for any photos in the project).
- Use the highest print quality available – usually “Best”. This is important as this means more ink is transferred to the fabric.
- Ensure the paper size set for the printer is the same size as the piece of printable fabric you are using. We use A4 printer paper in Australia.
- Place one piece of printable fabric in the printer and start the printing process.
- Once printed, leave the paper for 15 – 20 minutes to dry. This is important so you do not ruin the print.
- If you want to ensure the colour is water resistant, immerse the fabric in warm water for 10 minutes. Alternatively, to make it fully waterproof, you can soak it in vinegar for the same time.
- Let dry again, then your printed fabric is ready for incorporating into your work!
How to use the printed fabric in your work
- Sew the placement line as suggested in the project you are creating.
- Lay the printed fabric over the placement stitching line, ensuring the desired content of the image is sitting within the placement stitching.
- Trim up the printed image to make it easier to place if necessary, allowing/adding a half inch margin for safety on all edges.
- Depending on the fabric paper you have used, you may have to peel away the backing before stitching down on to your hoop.
- Position the fabric with the photo to cover the placement line and stitch down.
- Remove from the hoop and trim any excess.
- The next step will likely be embroidering a satin stitch around the edge of your photo, at which point you can continue to follow the instructions for the rest of the design!
The steps for using printable fabric and applying to your design should be the same for most scenarios but all of our designs explain each step once you have your photo printed on your fabric.
We also filmed a little video of the process with our new Making Memories quilt design:
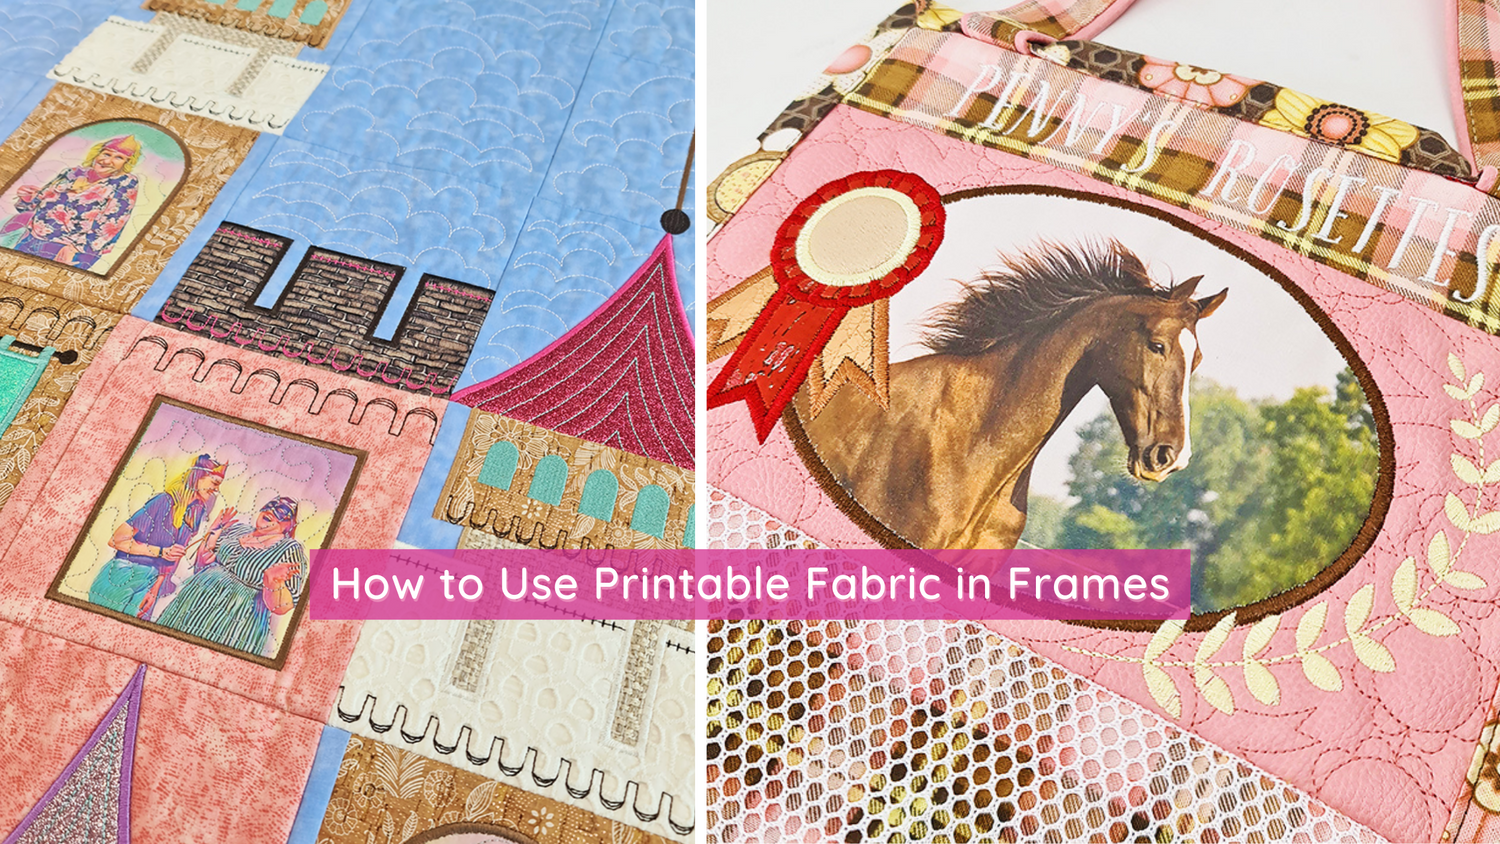
Want to try printable fabric in your next embroidery project? Some designs where we use inkjet printable fabric include the Castle Quilt (a fan favourite), the Rosettes Hanger (perfect for little sports stars), and the Love Wall Hanger (great for showing off your baby – furry or not!).

And don’t forget to tag us on Instagram or share in our Facebook group so we can see your great work!
Leave a comment
All comments are moderated before being published.
This site is protected by hCaptcha and the hCaptcha Privacy Policy and Terms of Service apply.